2009年12月8日 星期二

HA-NIC Bonding設定

HA-NIC Bonding設定 (兩張網卡服務一個IP)

  1. 查看load進來的module有那些,是否有bonding這個module
    1.  #lsmod | grep bond
  2. 生出一張ifcfg-bond0
    1. []# vi /etc/sysconfig/network-scripts/ifcfg-bond0
      DEVICE=bond0
      ONBOOT=yes
      BOOTPROTO=none
      IPADDR=140.137.217.155
      NETMASK=255.255.255.0
      GATEWAY=140.137.217.254
      USERCTL=no
  3. 修改ifcfg-eth0 (不要保留IP的設定)
    1. []# cat /etc/sysconfig/network-scripts/ifcfg-eth0
      DEVICE=eth0
      USERCTL=no
      ONBOOT=yes
      BOOTPROTO=none
      MASTER=bond0
      SLAVE=yes
  4. 修改ifcfg-eth1(不要保留IP的設定)
    1.  []# cat /etc/sysconfig/network-scripts/ifcfg-eth1
      DEVICE=eth1
      USERCTL=no
      ONBOOT=yes
      BOOTPROTO=none
      MASTER=bond0
      SLAVE=yes
  5. 修改/etc/modprobe.conf
    1. []# vi /etc/modprobe.conf
      #add 2 lines in the end
      alias bond0 bonding
      options bond0 mode=0 miimon=100
      (miimon 是提供 bonding module 要多久透過 MII 的介面檢查網路卡狀態,100 表示 100 milliseconds。)
  6. 啟動bonding
    1.  [TESTING] Enabling bonding
      []# modprobe bonding
      (#rmmod bonding--->如果要移除boonding重測,要執行這個指令)
  7. 查看bonding是否有成功
    1. []# cat /proc/net/bonding/bond0
      Ethernet Channel Bonding Driver: v3.2.4 (January 28, 2008)

      Bonding Mode: load balancing (round-robin)
      MII Status: up
      MII Polling Interval (ms): 0
      Up Delay (ms): 0
      Down Delay (ms): 0

      Slave Interface: eth0
      MII Status: up
      Link Failure Count: 0
      Permanent HW addr: 00:0c:29:8c:7c:7e

      Slave Interface: eth1
      MII Status: up
      Link Failure Count: 0
      Permanent HW addr: 00:0c:29:8c:7c:88
  8. 重啟網路服務
    1.  []# service network restart
  9. 查看是否bond0取得IP位址,eth0和eth1變成slave
    1. []# ifconfig
      bond0     Link encap:Ethernet  HWaddr 00:0C:29:8C:7C:7E
                inet addr:140.137.217.155  Bcast:140.137.217.255  Mask:255.255.255.0
                inet6 addr: fe80::20c:29ff:fe8c:7c7e/64 Scope:Link
                UP BROADCAST RUNNING MASTER MULTICAST  MTU:1500  Metric:1
                RX packets:8965 errors:0 dropped:0 overruns:0 frame:0
                TX packets:827 errors:0 dropped:0 overruns:0 carrier:0
                collisions:0 txqueuelen:0
                RX bytes:1077529 (1.0 MiB)  TX bytes:122763 (119.8 KiB)

      eth0      Link encap:Ethernet  HWaddr 00:0C:29:8C:7C:7E
                UP BROADCAST RUNNING SLAVE MULTICAST  MTU:1500  Metric:1
                RX packets:5012 errors:0 dropped:0 overruns:0 frame:0
                TX packets:750 errors:0 dropped:0 overruns:0 carrier:0
                collisions:0 txqueuelen:1000
                RX bytes:602470 (588.3 KiB)  TX bytes:108566 (106.0 KiB)
                Interrupt:67 Base address:0x2000

      eth1      Link encap:Ethernet  HWaddr 00:0C:29:8C:7C:7E
                UP BROADCAST RUNNING SLAVE MULTICAST  MTU:1500  Metric:1
                RX packets:3953 errors:0 dropped:0 overruns:0 frame:0
                TX packets:77 errors:0 dropped:0 overruns:0 carrier:0
                collisions:0 txqueuelen:1000
                RX bytes:475059 (463.9 KiB)  TX bytes:14197 (13.8 KiB)
Note:
1.從windows測試時,會有arp的問題
2.bonding的mode有很多種,狀況不同
數字表示      文字表示      說明
0     balance-rr    
‧負載平衡模式, 需有 switch 設定 (trunk) 支援才能發揮實質效果
‧具容錯功能, 其中一張 Slave 網卡失效仍可持續運作
1     active-backup    
‧同一時間只有單一 Slave 網卡運作
‧Active Slave 網卡失效時自動啟用次一順位 Slave 網卡
‧不需 switch 支援
5     balance-tlb     ‧傳出自動負載平衡
‧傳入由 Current Active Slave 負責
‧具容錯功能, 其中一張 Slave 網卡失效仍可持續運作
‧不需 switch 支援及設定
6     balance-alb     ‧傳出及傳入皆自動負載平衡
‧具容錯功能, 其中一張 Slave 網卡失效仍可持續運作
‧Slave 網卡 driver 需支援 setting hardware address 功能
‧不需 switch 支援及設定

2009年11月10日 星期二

Firewall指令

#iptables -t filter -L(列出表的規則內容)
                          -F(清空表格的內容 )
                          -A [鏈名大寫] (新增規則在最後一行)
                          -I [鏈名大寫] [行號] (插入到第幾行,可省預設第一行)
                          -R [鏈名大寫] [行號] (覆寫第幾行,不可省略行號)
                          -D[鏈名大寫] [行號] (刪除第幾行,可省預設符合的行)
                          -P(設定default-rule policy,該行永遠在鏈的所有規則之後)
#iptables --help (可查詢更多用法)
-t : 選表格
filter (內定)
nat
manager
raw


=======================
filter表包含三個chain (鏈)(可視為記憶體緩衝區或檢查區)
INPUT
OUTPUT
FORWARD
=======================
實作1

#iptables -F
#iptables -A INPUT -p tcp ACCEPT (-p:protocol為tcp, 動作為ACCEPT)
#iptables -A INPUT -p icmp -j ACCEPT
#iptables -P INPUT DROP (設定內定規則為丟棄)
[root@h155 ~]# iptables -L
Chain INPUT (policy DROP)
target     prot opt source               destination
ACCEPT     tcp  --  anywhere             anywhere
ACCEPT     icmp --  anywhere             anywhere

Chain FORWARD (policy ACCEPT)
target     prot opt source               destination

Chain OUTPUT (policy ACCEPT)
target     prot opt source               destination
note:除ACCEPT,DROP外,常用REJECT,表示丟棄packet並回報原發送主機,該packet丟棄
======================================
實作2
#iptables -I FORWARD 2 -o eth0 -d www.facebook.com -p tcp --dport 80 -j REJECT

#iptables -R FORWARD 2 -o eth0 -d ! www.facebook.com -p tcp --dport 80 -j ACCEPT

note:
eth0為連上internet之外介面經本機上internet之封包若是http://www.facebook.com的流量則將拒絶,並發訊息告知. (!表示反向的意思)

2009年11月2日 星期一

CentOS-安裝ncftp Client(source安裝)

Download ncftp
  • #wget ftp://ftp.ncftp.com/ncftp/ncftp-3.2.3-src.tar.gz
解壓縮
  • #tar xvfz ncftp-3.2.3-src.tar.gz
安裝
  • #cd ncftp-3.2.3
  • #vi README.txt --->先讀readme,了解要安裝的指令步驟
    • 2. General Instructions
      -----------------------

      To build NcFTP and the utility programs, you can simply do the following:

          1.  (Optional) Install ncurses (available from a GNU mirror).
          2.  Run the "./configure" script in the NcFTP source directory.
          3.  (Probably not necessary) Inspect the Makefiles in each subdirectory.
          4.  (Probably not necessary) Browse and edit config.h.
          5.  "make"
          6.  "make install"
  • #./configure --->check安裝環境
  • #make --->compiling
  • #make install --->安裝
    • Done installing NcFTP.

測試
  • #ncftp ftpserver --->連線到ftp站台
  • #ncftpput --->上傳檔案
  • #ncftpget --->取得檔案

CentOS-安裝Word Press

安裝word Press
  • #wget http://wordpress.org/latest.tar.gz
  • #mv wordpress /var/www/html
  • #chown apache.apache wordpress/ -R --->更換權限
設定
  • 執行http://IP/wordpress開始設定
  • 在設定過程中,可以在MySQL中建立db給word press使用

CentOS-網路卡的設定檔的放置位置

網路卡的設定檔的放置位置
/etc/sysconfig/network --->網路相關的設定檔案
/etc/sysconfig/network-scripts/*--->網路卡的設定,例如:ifcfg-eth0

GUI軟體更新設定檔時,設定檔放置的位置
/etc/sysconfig/networking/devices --->網路卡的設定
/etc/sysconfig/networking/profiles/* --->網路相關的設定檔案

NTP網路校時協定

NTP:network time protocol
#date --->查看現在的時間
#hwclock -r --->讀硬體時間 (r=read)
#ntpdate watch.stdtime.gov.tw --->校對台灣時間,以watch.stdtime.gov.tw的時間為準
#date --->查看現在的時間
#hwclock -w --->寫入硬體更新的時間 (w=write)

Note:安裝ntpd軟體,可成為時間對時伺服器

2009年10月30日 星期五

CentOS安裝phpMyAdmin

安裝phpMyAdmin

  • #wget http://downloads.sourceforge.net/project/phpmyadmin/phpMyAdmin/2.11.9.6/phpMyAdmin-2.11.9.6-all-languages.tar.gz?use_mirror=ncu
將解開的目錄(更改成phpmyadmin)放到/var/www/html
  • #cp phpmyadmin /var/www/html

建立config.inc.php
  • #cd /var/www/html/phpmyadmin
  • #cp config.sample.inc.php config.inc.php
修改設定
  • auth-type='http'
  • 登入驗證法說明如下:
    • cookie:使用瀏覽器cookie功能,需配合blow_fish密碼使用
    • http:使用http驗證對話框
    • config:將密碼寫在config.inc.php中
    • signon:配合單一簽入模組(single signon)使用
以mysql的帳號登入測試 

以jack帳號登入http://IP/phpmyadmin
請參CentOS連線mysql的GUI工具


2009年10月29日 星期四

CentOS-連線MySQL的GUI工具

MySQL放置處
  • #/var/lib/mysql --->MySQL的db放置處
  • #/var/log/mysql.log --->放log
  • #/var/run/mysqld --->process ID
登入mysql
  • [root@localhost ~]# mysql -u root -p

顯示engines;

  • mysql> show engines;
建立帳號jack管理phpbb3的db
  • mysql> grant all on phpbb3.* to jack@'%' identified by 'abc123';
  • Query OK, 0 rows affected (0.00 sec)
用jack登入
  • [root@localhost ~]# mysql -u jack -p
使用db:phpbb3
  • mysql> use phpbb3;
顯示phpbb3所有的table
  • mysql> show tables;
離開
  • mysql> quit
 ======================================
利用此工具連線MySQL

Download
mysql-gui-tools-5.0-r17-win32.msi

CentOS-Apache-SSL架設

設定檔位置
  • /etc/httpd/conf/httpd.conf
  • /etc/httpd/conf.d/ssl.conf
產生key檔
  • [root@localhost ~]# openssl genrsa -out www.key 1024
    • Generating RSA private key, 1024 bit long modulus
    • .................................++++++
    • .........++++++
    • e is 65537 (0x10001)
利用key建立憑證csr檔
  • [root@localhost ~]# openssl req -new -key www.key -out www.csr
    You are about to be asked to enter information that will be incorporated
    into your certificate request.
    What you are about to enter is what is called a Distinguished Name or a DN.
    There are quite a few fields but you can leave some blank
    For some fields there will be a default value,
    If you enter '.', the field will be left blank.
    -----
    Country Name (2 letter code) [GB]:TW
    State or Province Name (full name) [Berkshire]:Taipei
    Locality Name (eg, city) [Newbury]:Taipei
    Organization Name (eg, company) [My Company Ltd]:www
    Organizational Unit Name (eg, section) []:
    Common Name (eg, your name or your server's hostname) []:www.ne226.kirnel.com
    Email Address []:webmaster@ne226.kirnel.com

    Please enter the following 'extra' attributes
    to be sent with your certificate request
    A challenge password []:
    An optional company name []:
利用key,csr建立crt檔
  • [root@localhost ~]# openssl x509 -req -days 365 -in www.csr -signkey www.key -out www.crt
    Signature ok
    subject=/C=TW/ST=Taipei/L=Taipei/O=www/CN=www.ne226.kirnel.com/emailAddress=webmaster@ne226.kirnel.com
    Getting Private key
搬到適當地點
  • [root@localhost ~]# cp www.crt /etc/pki/tls/certs/
  • [root@localhost ~]# cp www.key /etc/pki/tls/private/
  • [root@localhost ~]# cp www.csr /etc/pki/tls/private/
修改檔案/etc/httpd/conf.d/ssl.conf
  • #   Server Certificate:
    # Point SSLCertificateFile at a PEM encoded certificate.  If
    # the certificate is encrypted, then you will be prompted for a
    # pass phrase.  Note that a kill -HUP will prompt again.  A new
    # certificate can be generated using the genkey(1) command.
    SSLCertificateFile /etc/pki/tls/certs/www.crt

    #   Server Private Key:
    #   If the key is not combined with the certificate, use this
    #   directive to point at the key file.  Keep in mind that if
    #   you've both a RSA and a DSA private key you can configure
    #   both in parallel (to also allow the use of DSA ciphers, etc.)
    SSLCertificateKeyFile /etc/pki/tls/private/www.key
重啟
  • #service httpd restart
測試
  • https://www.ne226.kirnel.com


2009年10月27日 星期二

檔案分割區使用量警告

範例:家目錄使用超過200M,寄信通知

步驟說明
  • 找出/home的使用量的第一行
    • #df | grep home
  • 取出第四個欄位
    • #df | grep home | awk '{print $4}'
  • 將結果設成變數
    • # n=`df | grep home | awk '{print $4}'`
    • # echo $n --->顯示出變數的值
    • 178672
寫文字檔warming.txt
  • #echo "Warming! your disk quota is 200M" > warming.txt 
寫成check.sh
  • #!/bin/bash
  • n=`df | grep home | awk '{print $4}'`;
  • echo $n
  • if [ $n > 200000 ];then
  •         mail -s "DiskHome Warming" user@gmail.com < warming.txt
  •         echo "success"
  • else
  •         echo "fail"
  • fi
Note:
也可以使用量百分比來計算
取出第五個欄位,並去掉%符號
[root@localhost ~]# df | grep home | awk '{print $5}'
4%
[root@localhost ~]# df | grep home | awk '{print $5}' | cut -d'%' -f1
4

linux資料備份

備份/home下的所有資料
  • #date +%Y%m%d-%H%M --->要用日期做檔名
  • #tar cvfz `date +%Y%m%d-%H%M`.tar.gz /home
增量備份-第二天備份只備份增加的部份,免得備份檔太大
  • 在備份完成後建立新檔案,做一個時間戳記
    • #touch /home/timemark
  • 找出比timemark更晚建立的檔案
    • #find /home -newer timemark
  • 建立新備份
    • #tar cvfz `date +%Y%m%d-%H%M`.tar.gz `find /home -newer timemark`
  • 以上寫成.sh檔案,放到crontab就可以每天自動執行了
linux異地備份
serverA利用public/privare key來保障傳送備份資料 serverB的安全
1.需要什麼服務?可以利用ssh/scp
2.如何全自動?寫成shell script

serverA
  • 建立key
    • #ssh-keygen -t rsa
    • Generating public/private rsa key pair.
    • Enter file in which to save the key (/root/.ssh/id_rsa): --->把key放這
    • Created directory '/root/.ssh'.
    • Enter passphrase (empty for no passphrase):--->輸入key的密碼(空白也可)
    • Enter same passphrase again:
    • Your identification has been saved in /root/.ssh/id_rsa.
    • Your public key has been saved in /root/.ssh/id_rsa.pub.
    • The key fingerprint is:
    • f6:32:90:e2:e7:03:c8:c1:a4:99:0b:3e:a1:73:3c:48 root@localhost.localdomain
  • 傳送public key到serverB的家目錄
    • #cd /root/.ssh
    • #scp id_rsa.pub root@serverBIP:~/
serverB
  • #cd~
  • #mkdir /root/.ssh
  • #cat id_rsa.pub >> .ssh/authorized_keys
Note:
如果有問題可檢查log
/var/log/secure

2009年10月22日 星期四

CentOS-架設sendmail

=======================================
事前準備:
用mail指令送信
  • # mail -s 'my test' aaa@gmail.com --->mail -s 標題 email位址


    • hello, I'd likt to buy many things --->輸入信件內容後,按enter
    • . --->結束信件內容輸入小數點,按enter
    • Cc: --->輸入信件副本


    檢查port 25要listen
    • [root@localhost ~]# netstat -tanlp | grep 25
      • tcp        0      0 127.0.0.1:25                0.0.0.0:*                   LISTEN      3059/sendmail: acce
    為自己的網域加上mx記錄:mail.ne226.kirnel.com
    • #vi /var/named/chroot/var/named/ne226.zone
      • www           IN A            140.137.217.226
      • w3              IN A            140.137.217.226
      • @               IN MX 10        mail --->@代表"ne226.kirnel.com.",權重=10
      • mail            IN A            140.137.217.226
    ======================================= 
    安裝步驟:
    1.架設sendmail必要套件 
    • #rpm -qa | egrep 'sendmail | m4'  --->查詢是否有安裝
      • sendmail-8.13.8-2.el5
        m4-1.4.5-3.el5.1
        sendmail-cf-8.13.8-2.el5 
      2.定義sendmail管轄網域名稱
      • #vi /etc/mail/local-host-names
        • # local-host-names - include all aliases for your machine here.
        • ne226.kirnel.com --->加上網域名稱
      3.允許外部ip連線 25 port
      • #vi /etc/mail/sendmail.mc --->將127.0.0.1改成0.0.0.0
        • DAEMON_OPTIONS(`Port=smtp,Addr=0.0.0.0, Name=MTA')dnl
      4.轉換mc檔為cf格式檔
      • #cd /etc/mail
      • #m4 sendmail.mc > sendmail.cf
      5.重啟sendmail
      • #service sendmail restart
      6.測試port25-在windows輸入以下指令
      • c:>telnet 140.137.217.226 25
      • HELO yourname - 通知 SMTP Server 你是誰(在linux mail server上有帳號)
        MAIL FROM: email@server.com - 寄件者電郵地址
        RCPT TO: email@smtpserver.com - 收件者電郵地址
        DATA - 以上步驟通過後,可以用 DATA 開頭並輸入信件內容,結束時用 “.”
        QUIT - 離開用 QUIT 結束 
      7.寄信給在主機上有帳號的人
      • 用gmail寄信給hello@ne226.kirnel.com
      8.讀取信件 --要切換成hello
      • $cd /var/spool/mail
      • $mail --->列出hello的新信
      • $&1--->讀取第一封
      • $more --->按空白鍵
      • $&q --->離開
      ================================== 
      應用:
      加入某網段,使sendmail願意為其傳送信件(寄件者用的pc所在的網段)
      • #vi /etc/mail/access
        • Connect:localhost.localdomain           RELAY
        • Connect:localhost                       RELAY
        • Connect:127.0.0.1                       RELAY
        • Connect:140.137.217                     RELAY
      •  #makemap hash access.db < access --->將access文字檔轉換成access.db格式
      • #service sendmail restart
      • 可以用outlook以hello@ne226.kirnel.com寄信給gmail帳號
      取信軟體dovecot
      • #cd /etc/dovercot/
        • protocols = imap imaps pop3 pop3s
      • #service dovecot restart
      • 可以用outlook取得hello@ne226.kirnel.com的信件
      =================================

      Note:
      信件讀完會被放在使用者的家目錄下:/home/hello/mbox
      linux的郵局:/var/spool/mail
      mail的log : /var/log/maillog

      CentOS限制ftp使用者的quota

      1.新增兩個使用者帳號,分別代表兩家公司
      • #groupadd vhusers
      • #useradd -g vhusers hello
      • #useradd -g vhusers kitty
      2.設定FTP服務,讓使用者hello,kitty可自行上傳網頁
      • #vi /etc/vsftpd/vsftpd.conf
        • anonymous_enable=NO
          chroot_list_enable=YES
      3.建立檔案/etc/vsftpd/chroot_list
      • #touch chroot_list--->寫入ftp使用者的帳號
        • hello
        • kitty
      4.重啟
      • #service vsftpd restart
      5.建立目錄並掛載對應
      • #cd /home/hello
      • #mkdir www
      • #mount --bind /opt/hello www
      • #cd /home/kitty
      • #mkdir www
      • #mount --bind /opt/kitty www
      6.限制hello,kitty網頁的儲存空間(quota)
      • #vi /etc/fstab --->新增usrquota
        • LABEL=/                 /                       ext3    defaults,usrquota        1 1
           
      • #mount -o remount / --->不用重開機的狀況下,重新掛根目錄
      • #quotacheck -uavmc --->產生一個新的aquota.user檔
        • quotacheck: Scanning /dev/sda3 [/] quotacheck: Cannot stat old user quota file: 沒有此一檔案或目錄
          quotacheck: Old group file not found. Usage will not be substracted.
          done
          quotacheck: Checked 579 directories and 4634 files
          quotacheck: Old file not found. 
      • #quotaon -av --->啟動磁碟配額的功能a=all,v=view
        • /dev/sda3 [/]: user quotas turned on 
      • #setquota hello 2000 3000 0 0 / --->軟性限制2M,硬性限制3M,inode的使用量0 0 表示軟性,硬性皆不限制
      • #repquota -u /--->查看根目錄下quota的使用者的狀況
        • *** Report for user quotas on device /dev/sda3
          Block grace time: 7days; Inode grace time: 7days
                                  Block limits                File limits
          User            used    soft    hard  grace    used  soft  hard  grace
          ----------------------------------------------------------------------
          root      --  259828       0       0           5209     0     0
          xfs       --       0       0       0              1     0     0
          hello     --       8    2000    3000              2     0     0
      Note:限制根目錄下hello的quota,前提是空間的owner為hello.或是hello有權限對此空間做存取

      2009年10月21日 星期三

      CentOS-Apache設同IP的virtual host

      在apache下設定兩個virtual host
      • #cd /etc/httpd/conf
        #vi httpd.conf
        • NameVirtualHost 140.137.217.226:80

        • Virtual Host 140.137.217.226:80>
        •     ServerAdmin webmaster@ne226.com
        •     DocumentRoot /opt/www
        •     ServerName www.ne226.kirnel.com
        •     ErrorLog logs/www-error_log
        •     CustomLog logs/www-access_log common
        • /Virtual Host
        • Virtual Host 140.137.217.226:80>
        •     ServerAdmin webmaster@ne226.com
        •     DocumentRoot /opt/w3
        •     ServerName w3.ne226.kirnel.com
        •     ErrorLog logs/w3-error_log
        •     CustomLog logs/w3-access_log common
        • /Virtual Host
      建立兩個目錄以及index檔案
      • #mkdir /opt/www
      • #mkdir /opt/w3
      • #echo "hello www" > /opt/www/index.html
      • #echo "hello w3" > /opt/w3/index.html
      重啟apache
      • #service httpd restart
      在browser上測試
      • http://www.ne226.kirnal.com
      • http://w3.ne226.kirnal.com

      2009年10月20日 星期二

      DNS的設定放置位置以及查詢工具

      DNS設定檔的位置
      • /etc/resolv.conf
        • # static DNS configuration using the following variables in the
          # /etc/sysconfig/network/config file:
          #     NETCONFIG_DNS_STATIC_SEARCHLIST
          #     NETCONFIG_DNS_STATIC_SERVERS
          #     NETCONFIG_DNS_FORWARDER

          # or disable DNS configuration updates via netconfig by setting:
          #     NETCONFIG_DNS_POLICY=''
      • /etc/sysconfig/network/config
      查詢工具
      • dig指令
        • #dig www.ibm.com @168.95.1.1 --->問168.95.1.1 (hinet dns) www.ibm.com的資訊
        • #dig ibm.com ns --->問ibm的name server
        • #dig tom.com mx--->問tom.com的信會寄到那
      • nslookup指令
        • #nslookup 查詢主機名稱 --->解析此主機的DNS是那一台.如果沒有指名,會去/etc/resolv.conf找
        • #nslookup
          • >server --->詢問dns server是那一台
          • >set type=mx --->設定查詢的資源紀錄型態為mx記錄
          • >set type=NS--->設定查詢的資源紀錄型態為NS記錄

      2009年10月19日 星期一

      CentOS NIS配合NFS

      請先參CentOS建立NIS
      前情提要:jeff 己經能登入client,但是無法存取/home/jeff
      因此將user建在server端的家目錄export出來給client,
      讓使用者jeff可以存取自己的家目錄

      Servere開啟nfs,export出/home
      • #vi /etc/exports --->加入以下文字
        • /home 140.137.217.0/24(rw,root_squash)
      • #showmount -e
      • #service nfs restart

      Client:umount本機的/home,掛上server所export的/home
      • #vi /etc/fstab
        • #/dev/sda3            /home                ext3       acl,user_xattr        1 2 --->註解此行
          140.137.217.94:/home     /home          nfs             defaults        1 2--->加入此行
      • #mount -a
      • #umount /home --->釋放本機的/home
      • #mount -a
      • #ls /home --->再查看/home,發現己經掛上server的/home了
        • client:~ # ls /home
        • jeff  lost+found

      2009年10月18日 星期日

      CentOS建立NIS

      NIS(Network Information Server)
      目的:統一帳號認證資料於一部主機
      伺服器名稱:Yellow Page

      相關請參CentOS NIS配合NFS

      需用軟體:
      • yp-tools-2.9-0.1 (Server,Client都需要)
        ypbind-1.19-11.el5 (Server,Client都需要)
        ypserv (NIS server,Server裝即可)

      環境設定--NIS Server:


      • #vi /etc/hosts
        • 127.0.0.1               localhost.localdomain localhost master.net98
          ::1             localhost6.localdomain6 localhost
          140.137.217.94 master.net98
          140.137.217.84 client.net98
      • #nisdomainname net98
      • #vi /etc/sysconfig/network


        NETWORKING=yes
        NETWORKING_IPV6=no
        HOSTNAME=localhost.localdomain
        NISDOMAIN=net98


      環境設定--NIS Client:

      • #vi /etc/hosts
        • 127.0.0.1               localhost.localdomain localhost client.net98
        • ::1             localhost6.localdomain6 localhost
        • 140.137.217.94 master.net98
        • 140.137.217.84 client.net98
      建立NIS server
      • 建立測試帳號
        • #groupadd test
        • #useradd -g test -m jeff
        • #passwd jeff
      • 設定NIS Server設定檔
        • #vi /etc/ypserv.conf --->取消最後一行的#
        • # If you have maps with YP_SECURE or YP_AUTHDES, you should create
          # a rule for them above, that's much faster.
           *                        : *       : *                : none
      • 啟動各項服務
        • #netstat -tanlp | grep :111 --->確認rpcbind(portmap) 有啟動
        • #service ypserv restart --->啟動 ypserv
        • #service yppasswdd restart --->啟動 yppasswdd (可遠端修改密碼的功能) 
        • #rpcinfo -p localhost --->檢查本機上rpc的狀況
      • 建立NIS map(資料庫查詢格式) --->將帳號相關檔放到/var/yp/網域/
        • # /usr/lib/yp/ypinit -m
        • At this point, we have to construct a list of the hosts which will run NIS
        • servers.  localhost.localdomain is in the list of NIS server hosts.  Please continue to add
        • the names for the other hosts, one per line.  When you are done with the
        • list, type a <control D>.--->要退出時打ctrl+D
        •         next host to add:  localhost.localdomain
        •         next host to add:  master.net98--->新增
        •         next host to add:
        • The current list of NIS servers looks like this:
        • localhost.localdomain
        • master.net98
        • Is this correct?  [y/n: y]  y--->確認
      • 測試--確認server是否己架設ok
        • # ypcat -h localhost passwd.byname --->localhost為主機名稱,不可用ip
        • jeff:$1$Cgv6Ls9G$vM79eQDEcmRq4zl1Xe3t1.:500:500::/home/jeff:/bin/bash


      NIS Client驗證
      以下工具都是去修改/etc/nsswitch.conf和/etc/yp.conf

      以OpenSuse為client做測試
       #yast


      現在可以利用遠端連線或按F1~F6換到登入模式利用jeff帳號登入來試試

      以CentOS為client做測試
       #LANG=C
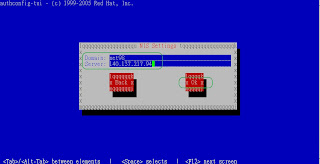
       #authconfig-tui


      批次輸入密碼

      1.先建立一個文字檔uu輸入帳號:密碼

      abc:A001
      abc2:B002
      abc3:C003

      2.將文字檔內容輸入到chpasswd (以下兩個指令皆可)
      #cat uu | chpasswd
      #cat uu > chpasswd

      2009年10月16日 星期五

      測試服務的port是否有通

      在windows中打以下指令
      • c:>telnet 192.168.220.100 80 --->telnet IP port number
      • 如果畫面全黑,打  Ctrl +  ]  --->表示有port通
      • c:>quit

      CentOS設定DNS管網域

      基本設定請參
      CentOS安裝dns (forward only)

      新增一個zone
      • #vi /etc/named.rfc1912.conf
        • zone "ne94.kirnel.com" IN {
        •         type master;
        •         file "ne94.zone";
        •         allow-update { none; };
        • };
      建立ne94.zone檔案的內容
      • #cd /var/named/chroot/var/named/
      • #cp localhost.zone ne94.zone
      • #vi ne94.zone
        • $TTL    86400
        • @               IN SOA  @       root (
        •                                         2009101601              ; serial (d. adams) --->序號
        •                                         3H              ; refresh
        •                                         15M             ; retry
        •                                         1W              ; expiry
        •                                         1D )            ; minimum

        •                 IN NS           @
        •                 IN A            127.0.0.1
        •                 IN AAAA         ::1
        • www          IN A            123.123.123.123 --->新增設定
        • w3              IN CNAME        www --->新增設定
      變更 ne94.zone的權限
      • #chown root.named ne94.zone
        • -rw-r----- 1 root  named  195  7月 30 08:56 localhost.zone
        • -rw-r----- 1 root  named  427  7月 30 08:56 named.zero
        • -rw-r----- 1 root  root   247 10月 15 16:14 ne94.zone
      測試
      • # dig @140.137.217.94 w3.ne94.kirnel.com --->回應正確
        • ;; ANSWER SECTION:
        • w3.ne94.kirnel.com.     86400   IN      CNAME   www.ne94.kirnel.com.
        • www.ne94.kirnel.com.    86400   IN      A       123.123.123.123

        • ;; AUTHORITY SECTION:
        • ne94.kirnel.com.        86400   IN      NS      ne94.kirnel.com.

        • ;; ADDITIONAL SECTION:
        • ne94.kirnel.com.        86400   IN      A       127.0.0.1
        • ne94.kirnel.com.        86400   IN      AAAA    ::1

        • ;; Query time: 1 msec
        • ;; SERVER: 140.137.217.94#53(140.137.217.94)
        • ;; WHEN: Thu Oct 15 16:22:12 2009
        • ;; MSG SIZE  rcvd: 128

      CentOS安裝dns (forward-only)

      1.bind的必需套件
      • bind
      • caching-nameserver (只負責forwarding的dns套件)
      • bind-chroot (change root directory)
      • bind-utils (dig..等工具)
      • system-config-bind(圖形介面設定工作)
        2.檢查並安裝
        • #rpm -qa bind*
        • #rpm -qa system-config-bind
        • #yum -y install bind system-config-bind --->安裝缺少的套件
        3.bind的設定檔/etc/named.conf
        • #ls -al /etc/named.caching-nameserver.conf
          • lrwxrwxrwx 1 root named 52 10月 15 14:41 /etc/named.caching-nameserver.conf -> /var/named/chroot//etc/named.caching-nameserver.conf
          • 真實的設定檔己經被chroot到粗體字的目錄下
        • #cd /var/named/chroot/etc/
        • #cp named.caching-nameserver.conf  named.conf
        • #ls -l --->發現named.conf權限不正確
          • -rw-r----- 1 root named 1195  7月 30 08:56 named.caching-nameserver.conf
            -rw-r----- 1 root root  1195 10月 15 14:57 named.conf
        • #chown root.named named.conf
        • #service named restart
        4.測試
        • #dig www.ibm.com @127.0.0.1 --->測試本機的dns是否有回應
          •  ;; Query time: 1994 msec
            ;; SERVER: 127.0.0.1#53(127.0.0.1)
            ;; WHEN: Thu Oct 15 15:09:00 2009
            ;; MSG SIZE  rcvd: 178
        • #vi named.conf --->提供dns服務給anyone
          • options {
          •         listen-on port 53 { any; };
          •         listen-on-v6 port 53 { ::1; };
          •  allow-query     { any; };
          • view localhost_resolver {
                    match-clients      { any; };
                    match-destinations { any; };
                    recursion yes;
                    include "/etc/named.rfc1912.zones";
            };


        2009年10月15日 星期四

        CentOS做nat

        先參考CentOS安裝dhcp做好dhcp,再做nat,這個CentOS linux就是一台ip分享器

        允許ip 傳送
        • # echo "1" > /proc/sys/net/ipv4/ip_forward 
        查看nat table,目前沒有設定
        • #iptables -t nat -L
        Chain PREROUTING (policy ACCEPT)
        target     prot opt source               destination

        Chain POSTROUTING (policy ACCEPT)
        target     prot opt source               destination

        Chain OUTPUT (policy ACCEPT)
        target     prot opt source               destination

         設定iptables
        • # iptables -t nat -A POSTROUTING -s 192.168.182.0/24 -o eth0 -j SNAT --to 140.137.217.94
          • -t nat (nat table)
          • -A (append)
          • POSTROUTING (post routing在路由之後進行)
          • eth0 (server上的網卡代號)
          • -o (output)
          • -s (source)
          • 192.168.182.0/24 (如果沒有/24,表示以單機192.168.182.0處理)
          • -j (jump)
          • SNAT (source NAT)
          • --to (超過二個字的指令要用--)
        • #iptables -t nat -L
        Chain PREROUTING (policy ACCEPT)
        target     prot opt source               destination

        Chain POSTROUTING (policy ACCEPT)
        target     prot opt source               destination
        SNAT       all  --  192.168.182.0/24     anywhere            to:140.137.217.94

        Chain OUTPUT (policy ACCEPT)
        target     prot opt source               destination
          相關資料可參考OpenSuse做nat

          CentOS安裝dhcp server


          dhcp server : CentOS
          設定兩張網卡:
          bridge:
          • 設定成dhcp,取得ip為140.137.217.95

          host-only:
          • #setup
          • #選Network Configuration / EEdit a device param / eeth1
            • Use DHCP [ ] --->按空白鍵取消 *
            • static IP =192.168.182.100
            • mask = 255.255.255.0
            • GW:140.137.217.95
          • #service network restart
          安裝dhcp
          • #rpm -qa | grep dhcp --->檢查是否有安裝
          • #yum -y install dhcp --->安裝dhcp
          設定dhcp設定檔
          • #vi /etc/dhcpd.conf --->剛安裝好,是空白的.叫你去參考別支檔案.dhcp*表示dhcp的版本
          • #cp /usr/share/doc/dhcp-3.0.5/dhcpd.conf.sample /etc/dhcpd.conf --->將範例copy過來改
          • #vi /etc/dhcpd.conf--->以下為檔案修改的內容,粗體字為修改的部份

          subnet 192.168.182.0 --->服務的網段netmask 255.255.255.0 {

          # --- default gateway
                  option routers                  192.168.182.100;--->路由
                  option subnet-mask              255.255.255.0;

                  option nis-domain               "domain.org";
                  option domain-name              "domain.org";
                  option domain-name-servers      168.95.1.1;--->dns,設成hinet

                  option time-offset              -18000; # Eastern Standard Time
          #       option ntp-servers              192.168.1.1;
          #       option netbios-name-servers     192.168.1.1;
          # --- Selects point-to-point node (default is hybrid). Don't change this unless
          # -- you understand Netbios very well
          #       option netbios-node-type 2;

                  range dynamic-bootp 192.168.182.200 192.168.182.201;--->提供的ip,這裏設成二個
                  default-lease-time 21600;
                  max-lease-time 43200;

                  # we want the nameserver to appear at a fixed address
                  host ns {
                          next-server marvin.redhat.com;
                          hardware ethernet 12:34:56:78:AB:CD;
                          fixed-address 207.175.42.254;
                  }
          }

          • #vi /etc/sysconfig/dhcpd
          DHCPDARGS="eth1"

          • #cd /etc/init.d/dhcpd start --->啟動dhcp
          • #tail -f /var/log/messages --->查看dhcp的log

          dhcp client : Open Suse
          • 停止VMWare DHCP 服務
          • #dhcp -r --->釋放ip (#dhcp eth0 -r 指令網卡釋放dhcp ip)
          • #dhcp --->重新取得ip

          2009年10月14日 星期三

          CentOS設定phpBB-變更語系

          CentOS安裝phpBB3

          Install完畢後,移除以下檔案
          • #cd /var/www/html/phpBB3
          • #mv install installbak
          變更語系
          • #cd /var/www/html/phpBB3/language
          • #wget http://www.phpbb.com/files/language_packs_30x/lang_zh_cmn_hant.tar.gz --->download繁體中文包
          • #tar xvfz  lang_zh_cmn_hant.tar.gz --->解壓縮
          • http://140.137.217.94/phpBB3 --->以當初論壇管理設定的帳號密碼登入


          變更同語系的面版圖示
          • #cd /var/www/html/phpBB3/styles
          • #wget http://www.phpbb.com/files/language_packs_30x/prosilver_zh_cmn_hant.tar.gz--->download繁體中文面版包
          • #tar xvfz  prosilver_zh_cmn_hant.tar.gz  --->解壓縮
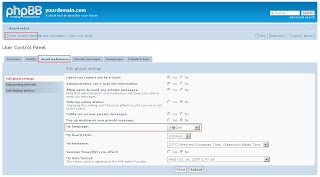
          • 下圖的圖示"發表主題"己經變成中文的了
           

          linux中dhcp釋放與取得ip

          #dhclient -r --->釋放dhcp的IP
          #dhclient --->重新取得IP

          CentOS移除以及安裝mysql-server

          如果忘記了mysql-server的密碼,只好重裝 :

          #yum remove mysql-server --->移除mysql-server
          #rm -rf /var/lib/mysql/ --->徹底清除相關目錄
          #yum -y install mysql-server --->安裝
          #service mysqld restart --->重啟服務
          #mysqladmin -u root password 填新密碼 --->變更mysql的root的密碼

          CentOS安裝phpBB3

          啟動mysql
          • #service mysqld restart
          • #mysql -u root -p --->用root輸入密碼登入mysql
          • mysql >show databases; --->顯示系統的database(注意有分號)
          • mysql >exit; --->離開mysql(注意有分號)

          啟動apache
          • #service httpd restart
          • #vi /var/www/html/test.php --->寫一個簡單的php檔
          • http://140.137.217.94/test.php --->測試是否ok


          安裝PHPBB
          • #cd /var/www/html
          • #wget 網址 --->在linux上有網址可以直接用wget指令去get file
          • #bunzip2 phpBB3.tar.bz --->檔案用bzip2壓縮,用bunzip2解壓縮
          • #tar xvf phpBB3 --->用tar解壓縮
            • http://IP/phpBB3/ --->連結到php的安裝網頁

          安裝php與mysql的連結module:php-mysql
          • #yum search mysql --->利用search指令找mysql相關的軟體php-mysql
          • #yum -y install php-mysql --->安裝php-mysql (-y表示所以問題都回答yes)
          • #cd /var/www/html
          • #chown apache.apache phpBB3 -R --->更改config.php權限,讓phpBB能寫入
           設定PHPBB
          • 登入mysql先建立db:phpbb3
            • #mysql -u root -p
            • mysql > create database phpbb3;
            • mysql > show databases; --->會看到新增了一個phpbb3
          • Database setting:http://140.137.217.94/phpBB3/


          CentOS關閉firewall

          1.關閉Selinux
          • #vi /etc/sysconfig/selinux
            • SELINUX=disabled
          • #LANG=C
          • #setup
            • 選Firewall Configuration
            •  Security Level = Disabled
            •  SELinux = Disabled
          • #reboot
          2.關閉firewall
          • #iptables -L
          • #LANG=C
          • #setup
            • 選Firewall Configuration
            • 選Customize
            • allow incoming = *ssh,*samba,*nfs4,*mail (SMTP) --->將要開放的port勾選
          Note:
          安全增強式Linux(SELinux, Security-Enhanced Linux)
          是一種強制存取控制(mandatory access control)的實現。
          它的作法是以最小權限原則(principle of least privilege)為基礎,
          在Linux核心中使用Linux安全模組(Linux Security Modules)。
          它並非一個Linux發行版,而是一組可以套用在類Unix作業系統(如Linux、BSD等)的修改。

          CentOS 安裝NFS (Network File System)

          #yum install nfs-utils --->安裝nfs
          #vi /etc/exports --->寫入以下內容
          /opt/files 140.137.217.0/24(rw,no_root_squash)
          #service nfs start --->啟動服務
          #showmount -e --->查看

          相關資訊請參OpenSuse安裝NFS

          OpenSuse 安裝NFS (Network File System)

          分享LinuxA上的部分HD空間給LinuxB

          LinuxA:IP=140.137.217.19
          1.確認Remote Procedure Call port:111是在Listen
          2.安裝nfs-kernel-server以及nfs-utils
          • #yast -i nfs-kernel-server nfs-utils
          3.寫入要匯出的空間
          • #vi /etc/exports  --->預設值為no_all_squash,寫入以下內容
          •  /opt/files 140.137.217.0/24(rw,no_root_squash)
                   (匯出檔案)(允許mount的ip來源)(權限設定)
          • rw=可讀寫
          • root_squash=把root轉換成nobody帳號及其權限
          • no_root_squash=不把root轉換成nobody帳號及其權限
          • no_all_squash=不會強制把所有使用者的權限轉換nobody帳號(uid=65534,gid=65534),此為預設值
          • #/etc/init.d/nfsserver restart --->重啟
          4.建立檔案
          • /opt#mkdir files
          LinuxB:
          1.查看NFS server可分空間
          • #showmount -e 140.137.217.19
          2.掛載
          • #mount -t nfs 140.137.217.19:/opt/files /data
          3.開機時就掛載,在/etc/fstab中加入以下文字
          • #vi /etc/fstab --->寫入以下內容
          • 140.137.217.19 /data nfs defaults 0 0
                    (以上請用tab鍵隔開,除了00中間是空格)

          4.修改/etc/fstab之後需要讓系統更新掛載
          • 重開機#reboot
          • 或是執行#mount -a
          5.如果deraults改成noauto,則開機時不會自動掛載,但打入以下指令就可快速掛載
          • #mount /data
          Note:
          1.請注意,不論exports的權限設定如何,還是要確認linux下/opt/files的檔案權限也要相互配合,檔案才能正常寫入
          2.建議如果多台client掛載使用相同的分享空間,最好使用同一個使用者帳號(uid相同),或是建置NIS來管理帳號
          請參CentOS建立NIS

          2009年10月11日 星期日

          ftp使用方式

          連線140.137.217.176的ftp
          • #ftp 140.137.217.176
          登入
          • #ftp --->利用匿名方式登入(打anonymous也可以)
          取得file

          • #get 檔名
          上傳file
          • #put 檔名
          離開
          • #quit --->(打bye也可以)

          smbclient使用方式

          列出140.137.217.176上的samba資源 (-L =list)
          • #smbclient -L 140.137.217.176
          登入 140.137.217.176的www資源
          • #smbclient -U max //140.137.217.176/www
          取得file
          • #get 檔名
          上傳file
          • #put 檔名
          離開
          • #exit
           Note:
          smbclient也可以利用同樣的方式讀取windows上的分享檔案

          samba應用-建立網路磁碟機,讓使用者能更新公司網頁

          讓max能直接更新公司網頁

          1.切換到max的家目錄,建立連結
          #ln -s /srv/www/htdocs www
          lrwxrwxrwx   1 max  users       15 Oct 12 09:47 www -> /srv/www/htdocs

          2.切換到/srv/www/htdocs目錄查看,發現目錄權限為root.root,更換權限為max.root
          #chown max * -R --->/src/www/htdocs下的目錄及檔案其owner都設為max


          3.在windows下會看到使用者max的目錄下多了WWW這個目錄


          如果要更新網頁的不只一人?方法1

          1.新增另一個user:joe
          2.新增webdesigner群組
          • #groupadd webdesigner
          3.將joe以及max都放入此群組
          •  #usermod -G webdesigner max --->(-G表示副群組)
          •  #usermod -G webdesigner joe --->(-G表示副群組)
          •  #id max --->查看max是否多了一個副組群組
          •  #id joe --->查看joe是否多了一個副組群組
          4.將/srv/www/htdocs的group改成webdesigner
          •  # chown :webdesigner htdocs -R
          • 顯示drwxr-xr-x 5 root webdesigner 4096 Oct  8 15:17 htdocs
          5.但是group的權限為r-x,仍然不能w,所以修改權限
          • # chmod g+w htdocs -R
          6.測試連線,如果joe無法連線,檢查是否joe沒有samba帳號
          • #smbpasswd -a joe --->新增joe samba帳號
          • #vi /etc/samba/smbpasswd  --->檢查是否joe有samba帳號
          如果要更新網頁的不只一人?方法2
          1.新增一個samba資源www,並限定只有max, joe可以使用該資源
          #vi /etc/samba/smb.conf

          [www]
                  path = /srv/www/htdocs
                  writeable = Yes
                  guest ok = No
                  valid users = max,joe --->也可改成@webdesigner群組
                  create mask = 664 --->新增檔案的預設權限
                  directory mask = 775 --->新增目錄的預設權限
                  force group = webdesigner --->
                  強制新增的預設群組為webdesigner 
                 (如果沒設,會變成使用者的primary group,
                  但是webdesigner為副群組)

          2.重啟samba

          Note:
          可以利用#man smb.conf來查詢更多設定方式
          相關參考smb限定使用者帳號

          2009年10月9日 星期五

          samba 開放目錄-限定使用者

          1.修改檔案 #vi /etc/samba/smb.conf

          [global]
                  workgroup = WORKGROUP --->samb啟動後,預設的群組
                  security = user --->建立使用者驗證的samba伺服器

          [users]
                  comment = All users
                  path = /home --->開放linux中 /home/以下使用者的家目錄

                  read only = No --->可以寫入
                  inherit acls = Yes
                  veto files = /aquota.user/groups/shares/
          2.新增samba使用者 (必須也有linux的帳號)
          • #cd /etc/samba
          • #smbpasswd -a max --->max己存在於linux中,建立samba user max及其密碼
          • #cat /etc/samba/smbpasswd --->查看是否真的建立了一筆資料在此檔中
          3.在windows中做測試,看是否能連結到user/max的目錄
          • c:>net use * /del /y --->取消遠端連結.讓網路芳鄰不再記得密碼,免得不用密碼就能進入,這樣無法測試
          其他請參安裝samba

          安裝samba

          #yast -i samba samba-client --->安裝samba以及samba-client
          #testparm -s /etc/samba/smb.conf --->利用testparm檢查smb.conf的參數是否正確
          #vi /etc/samba/smb.conf ---->編輯檔案

          [global]
                  workgroup = WORKGROUP --->samb啟動後,預設的群組
                  security = share --->建立一個不需驗證的samba伺服器

          [public] ----->新增share,名稱叫public
                  path = /opt/public --->真實開放的目錄(自己建立)
                  writeable = No
          --->不允許寫入
                  guest ok = Yes --->開放guest進入


          [upload]
          ----->新增share,名稱叫upload(自己建立)
                  path = /opt/upload
          --->真實開放的目錄(自己建立)
                  writeable = Yes
          --->允許寫入
                  guest ok = Yes
          --->開放guest進入

           ==============================================
           結果:
          一般使用者guest可以讀取public
          一般使用者guest可以讀取upload,但是仍無法寫入,要再加上以下步驟
          • 1.在[global]中加上以下文字
            • guest account = nobody --->linux上的user nobody設為guest account
          • 2.#chown nobody /opt/upload 
            • drwxr-xr-x  2 nobody root 4096 Oct  9 14:57 upload

          2009年10月8日 星期四

          檢查Linux上服務安裝及啟動狀況

          #rpm -qa | grep abc--->查詢是否有安裝abc軟體 or #rpm -qa a*
          #rpm -ql abc | more --->查詢abc安裝在何處
          #chkconfig abc--->查詢abc服務是否啟動
          #netstat -tanlp | grep :port number --->檢查abc是否確實有Listen
          • samba- port:139以及port:445
          • apache- port:80
          #ps -aux | grep abc --->process是否有存在

          開機後即自動啟動

          #chkconfig -a abc -->將服務加入 (-d  abc 將服務移除)

          服務可能的放置目錄
          /etc/init.d/
          /usr/sbin/
          /usr/local/sbin/

          #rpm -qf /etc/init.d/nfs --->反查nfs服務的名稱及版本

          Linux上appache網站掛了的處理步驟

          網站掛了的處理步驟
          • netstat -tanlp | grep :80 --->port 80是否有Listen
          • /etc/init.d/apache2 (or httpd) restart --->如果沒有,重啟
          • rpm -ql apache2 | more --->找出apache2(軟體名稱)放置的目錄
          • 檢視log: /var/log/apache2/  --->查查log,看是那出了問題
            • access_log
            • error_log
            • lastlog

          安裝ntop--管理本機流量及分析

          1.安裝ntop

          2.設定 ntop管理者密碼
          • #ntop -A
          3.啟動ntop (必須是root身份)
          • #ntop -d -L -u root
          4.預設使用port:3000,安裝完畢後在browser執行:http://localhost:3000

          類似工具請參MRTG應用

          2009年10月7日 星期三

          MRTG工具應用

          TCP/IP網管協定SNMP (Simple Network Management Protocol)
          • SNMP Server (管理站-應用程式),例 MRTG
            • MRTG(Multi Router Traffic Groupher): 將router上的流量製作成網頁 (圖形),以供網管人員作頻寛流量分析.
            • 安裝net-snmp
          • SNMP Agent (代理程式) linux的snmpd服務
            • IP分享器是否支援snmp協定?如果有,啟動snmp功能(Agent),方便管理
            • 安裝net-snmp

          Server MRTG     -------> FW snmpd --------> Internet
          (Server)                            (Agent)


          如何得知經過FW的流量?

          • Server MRTG(管理者,設ip=192.168.11.100):發出SNMP Request Message (Get OID)
          • FW:SNMP(被管理者,設ip=192.168.11.254) Response (Data)
          =========================================
          實作

          1.安裝net-snmp元件 (在server,FW都裝)

          2.設定管理參數(在server,FW都設定)
          • #vi /etc/snmp/snmpd.conf
            • #rocommunity public 127.0.0.1 ---> 此行註解ro=read only
            • 加上rocommunity labpublic 192.168.11.100 ---> labpublic為新設的社群名稱,192.168.11.100為SNMP Server (管理者IP)
            • 存檔後重啟snmpd
          3.安裝mrtg(在server上裝,server上也要裝好apache)

          • 產生"被管理設備"的mrtg設定檔
            • #mkdir /etc/mrtg -->存放mrtg.cfg
            • #mkdir /srv/www/htdocs/mrtg -->存放網頁處
            • #cfgmaker labpublic@192.168.11.254 > /etc/mrtg/mrtg.cfg --->抓取網卡資料,labpublic@192.168.11.254去跟192.168.11.254要資料
            • #vi /etc/mrtg/mrtg.cfg --->在此檔中加入以下文字
              • Language: big5
              • Options[_]: growright --->向右靠
              • WorkDir: /srv/www/htdocs/mrg --->工作目錄
          • 使用mrtg.cfg 搜集/製做網頁檔
            • #env LANG=C mrtg /etc/mrtg/mrtg.cfg --->(LANG=C 將執行時語系改為英文) 網頁產生到工作目錄 /srv/www/htdocs/mrtg
          • 產生index.html首頁檔
            • #index.html /etc/mrtg/mrtg.cfg --output=/srv/www/htdocs/mrtg/index.html
          • 觀察:由firefox上http://your IP/mrtg
          =========================================
          列入Crontab工作排程
          •  */5 * * * *表示分 時 日 月 年,*/5表示每5分鐘執行一次
          • #crontab -e --->在crontab中寫入以下文字
            • */5 * * * * env LANG=C mrtg /etc/mrtg/mrtg.cfg
            • */5 * * * * index.html /etc/mrtg/mrtg.cfg --output=/srv/www/htdocs/mrtg/index.html 


          =========================================
          服務管理 (自行代換中間的服務名稱)


          啟動
          • #service snmpd status -->檢查
          • #service snmpd start --->啟動服務
          • #service snmpd status -->檢查
          停止服務
          • #service snmpd stop--->停止服務
          重啟服務
          • #service snmpd restart --->重啟服務

          開機後即自動啟動
          • #chkconfig snmpd  -->檢查
          • #chkconfig -a snmpd  -->將服務加入 (-d  snmpd 將服務移除)
          • #chkconfig snmpd -->檢查

          提供外部用戶來到私有ip主機的nat方式

          範例一:變動IP
          網段:192.168.11.0/24
          主機FW:
          • eth0 (ISP-DHCP)
          • eth1 (192.168.11.254)
            • FW-WWW (192.168.11.110)
            • FW-FTP (192.168.11.111)
          #iptables -t nat -A POSTROUTING -o eth0 -s 192.168.11.0/24 -j MASQUERADE
          #iptables -t nat -A PREROUTING -i eth0 -p tcp --dport 8181 -j DNAT --to 192.168.11.100:80
          #iptables -t nat -A PREROUTING -i eth0 -p tcp --dport 21 -j DNAT --to 192.168.11.111:21

          • 由isp動態配置ip (DHCP),public IP address (eth0)不固定,所有user使用eth0 ip做為轉址ip (nat ip)
          • 設定內部主機提供www(port :80),ftp(port:21),服務在取得之public IP位址服務埠改為 (8181,21)
          • 註:由於public IP位址不固定,外部必須配合DDNS作業,才能即時提供服務

          =======================================
          範例二:固定IP
          主機FW:
          • eth0 (static 設定固定ip to Internet)
            • 140.137.217.250 (介面ip)
            • 140.137.217.251 (第二ip) 
            • 140.137.217.252 (第三ip)
          • eth1 (192.168.11.0/24)
            • www:192.168.11.100:80
            • Security www:192.168.11.111:443
          • eth2 (192.168.22.0/24)
            • 192.168.22.21 (user1)
            • 192.168.22.29 (user2)

          #iptables -t nat -A POSTROUTING -o eth0 -s 192.168.11.0/24 -j SNAT--to 140.137.217.251
          #iptables -t nat -A POSTROUTING -o eth0 -s 192.168.11.0/24 -j SNAT--to 140.137.217.252
          #iptables -t nat -A PREROUTING -i eth0 -d 140.137.217.251 -p top --dport 8080 -j DNAT --to 192.168.11.100:80
          #iptables -t nat -A PREROUTING -i eth0 -d 140.137.217.251 -p top --dport 443 -j DNAT --to 192.168.11.111:443

          在VM中建立nat(以OpenSuse試做)

          在VM中開啟兩台Open Suse, 一台取名:server,另一台取名FW (FW做為nat主機)


          1.設定網卡以及路由
          • 設定FW網卡
            • 增加二張網卡
              • eth0:bridge
              • eth1:host-only
            • IP位址設定
              • #vi /etc/sysconfig/network/ifcfg-eth0
                • BOOTPROTO='static'
                • IPADDR='140.137.217.176/24'
                • IPADDR_eth11='140.137.217.226/24'
                • LABEL_eth11='eth11'
            • 第二IP設定 
              • #vi /etc/sysconfig/network/ifcfg-eth1
                • BOOTPROTO="static"
                • IPADDR="192.168.11.254/24"
            • 閘道器位址(Gateway)
              •  #vi /etc/sysconfig/network/routes
                • default 140.137.217.254 - -
            • 打Linux開路由功能設定(有雙卡介面以上才需要)
              •  #vi /etc/sysconfig/sysctl
                • IP_FORWARD='yes'
            • 重啟network service
              • #service network restart
          • 設定server網卡  
            • 設定網卡:eth0:host-only
            • IP位址設定
              • #vi /etc/sysconfig/network/ifcfg-eth0
                • BOOTPROTO="static"
                • IPADDR="192.168.11.100"
            • 閘道器位址(Gateway)
              •  #vi /etc/sysconfig/network/routes
                •  default 192.168.11.254 - -
            • 重啟network service
              • #service network restart
          2.Ping測試(在server上下ping的指令)
          • ping 192.168.11.100 --->server自己ip
          • ping 192.168.11.254 --->server的gw
          • ping 140.137.217.176 --->成功的話,FW具有routing能
          • ping 140.137.217.254 --->失敗 (因為此台gw無法回應192.168.11.xxx私有網段)
          3.NAT功能設定
          • #vi /etc/sysconfig/network/ifcfg-eth0   --->設定網卡 (server,FW上都要設定)
          • #vi /etc/sysconfig/network/routes   --->設定路由 (server,FW上都要設定)
          • #vi /etc/sysconfig/sysctl   --->開啟FW linux的路由功能
            • IP_FORWARD="yes"  (約在第24行)
          • #iptables -t nat -A POSTROUTING -o eth0 -s 192.168.11.0/24 -j SNAT --to 140.137.217.226 --->在nat表的POSTROUTING chain上由eth0輸出時,來自於192.168.11.0/24 的封包,其source Address改成140.137.217.226再行送出. (如果要設定更多的對外ip轉換,此指令再執行一次,--to之後的ip換成140.137.217.176即可)
            • -t nat (nat table)
            • -A (append)
            • POSTROUTING (post routing在路由之後進行)
            • eth0 (server上的網卡代號)
            • -o (output)
            • -s (source)
            • 192.168.11.0/24 (如果沒有/24,表示以單機192.168.11.0處理)
            • -j (jump)
            • SNAT (source NAT)
            • --to (超過二個字的指令要用--)
          • #iptables -t nat -L --->顯示nat表格內容 (此表格存在於memory中,關機就消失了)
          • #iptables -t nat -F --->清除nat的內容
           4.其上他上網條件,需要設定dns
          • #vi /etc/resolv.conf
          5.提供外部用戶由公用住址來到私人主機(有提供服務之FW主機:www,ftp,Email等)
          • #iptables -t nat -A PREROUTING -i eth0 -d 140.137.217.226 -j DNAT --to 192.168.11.100--->在nat表的PREROUTING chain上由eth0輸入時,來自於140.137.217.226 的封包,其destination Address改成192.168.11.100再行送出.
            • -t nat (nat table)
            • -A (append)
            • PREROUTING (pre routing在路由之前進行)
            • eth0 (FW上的網卡代號)
            • -i (input)
            • -d (destination)
            • -j (jump)
            • DNAT (destination NAT)
            • --to (超過二個字的指令要用--)
          • 其他參考:固定ip與變動ip

          2009年10月6日 星期二

          安裝phpMyAdmin

          1.Download phpMyAdmin 3.2.2版
          2.解壓縮後
          • 放到 /srv/www/htdocs  是apache2 放置的目錄
          • 將資料夾更名成:phpMyAdm
          3.安裝 (安裝方式請參OpenSuse軟體安裝)
          • php5_bz2
          • php5_mcrypt
          • php5_openssl
          • php5_pear相關的全部

          4.http://127.0.0.1/phpMyAdm/setup --->利用setup建立一個config檔 (也可參考config.sample.inc.php檔)
          • overview > servers > New server > Add a new server
            • server hostname:127.0.0.1
            • server port: 3306
            • User for config auth: root (暫用)
            • Password for config auth : 設密碼
            • Authentication type : cookie
            • Connect without password : 勾選 
          • 輸出 > Configuration file > download
            • download config.inc.php 檔案到/srv/www/htdoc/phpMyAdm

          5.重啟apache2 --->重新load設定檔

          6.建立 config.inc.php 檔案成功後,移除setup檔案或是更改其權限,免得被重新設定

          7.用帳號密碼登入 http://127.0.0.1/phpMyAdm,就可以連結到MySQL db了